Introduction
So, you already have something to record with. Now you need to answer the next question: where? And despite appearances, it is not that simple. Your biggest enemies will be echo and background noise, and your best allies will be soft furniture and carpets.
Where should you record?
To build yourself a proper recording studio, you need space. A space that every now and then will turn into a recording studio, because not many people can afford to dedicate an entire room to a hobby.
Unwanted sounds
The biggest enemy of good quality is perfectionism. Echo is in second place, and background noise is in third. By pure coincidence, they are also ordered by how much it costs to reduce their impact. It is best to test rooms at the time of day when you plan to record.
Echo and reverb
Echo, echo, echo. To check whether you have an echo problem in a room, just clap your hands loudly. It is hard to explain what you should hear, or rather what you should not hear. The best reference point is a wardrobe full of hanging clothes. Stand in front of an open wardrobe, spread the hangers a little, and clap your hands. The clothes will dampen the sound. That is your echo benchmark. Walk around your house or apartment and check every room. Doors should be closed, windows too. Blinds and shutters should be closed, and if you have curtains, close them as well.
Notice that the more soft furniture there is, the less echo there is in the room. Things you find in a typical apartment that reduce sound wave reflections are sofas, pillows, chairs with soft upholstery, curtains, and carpets (the softer the carpet, the better).
What reflects sound very well, on the other hand, is hard floors, empty walls, windows, and glass panels in doors.
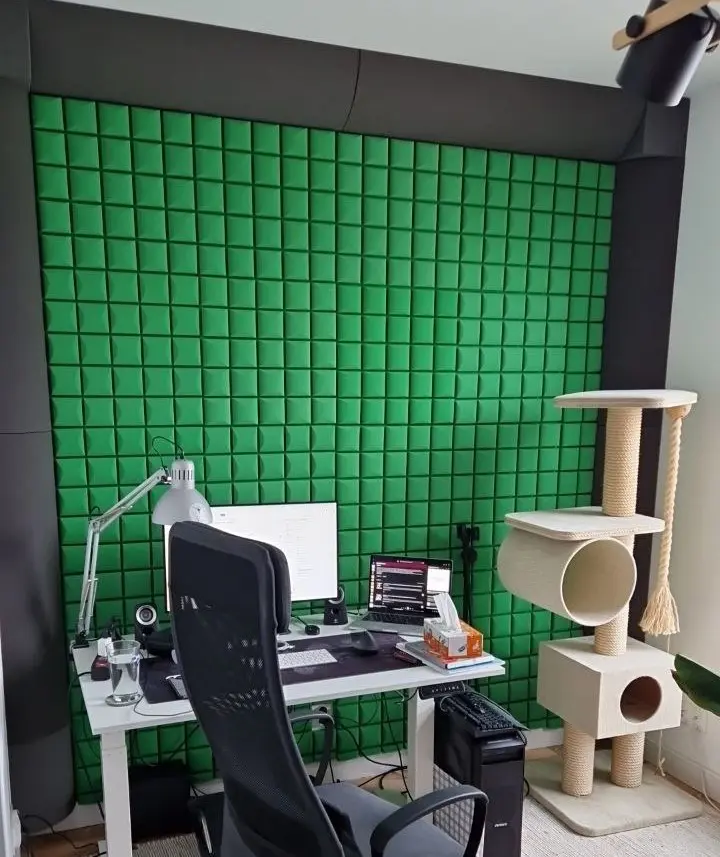
Are you starting to see how this works? Very good. I chose my office as my recording space. Unfortunately, I had terrible reverb there, but there are ways to reduce it. As a side effect, I also made working from home much more comfortable.
I covered an entire wall with acoustic panels. The ones I chose cost over 7 EUR (8 USD) each, which is definitely on the more expensive side. I needed around 30 of them, plus bass traps in the corners, and in total it cost me about 236 EUR (275 USD). I spent quite a lot, but as I mentioned earlier, this is also my workspace, so I really cared about improving its comfort. Covering that one wall reduced the reverb practically to zero.
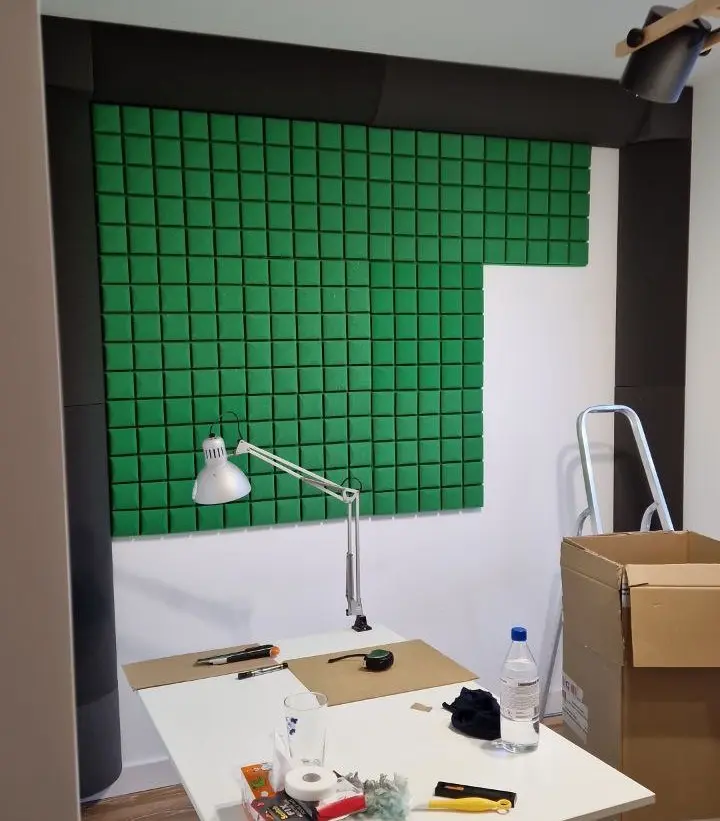
Sticking the panels to the wall is simple and quite satisfying, especially because you can cut them to size with a utility knife. And this is what the whole thing looks like:
Sounds from outside
This part is harder. Sounds from outside are a problem, but not such a huge one. The most annoying ones will be passing cars, car alarms, barking dogs, and loud conversations. Their main source will be the window, even when it is closed. If you can, hang curtains. The thicker and heavier they are, the more they will help reduce outside annoyances. Not every sound you hear will be picked up by the microphone, and even if it is, there are ways to deal with that too, so let us not panic. My biggest nuisance is passenger planes flying overhead, and the solution is simply to pause the recording while they pass.
Alternatives
OK, but what if you do not have your own office or another spare room? There are ways around that too.
Living room
The room that also met the acoustic requirements in my apartment was the living room. I ran a few tests where I recorded while sitting comfortably on the couch, and it worked perfectly fine. There was no reverb, I have heavy blackout curtains there, and plenty of soft furniture. Unfortunately, this meant blocking the living room for the rest of the household, so I would have to wait with recording until everyone went to sleep. On top of that, I have an open kitchen, and the running dishwasher was the final nail in the coffin for that idea.
Walk-in closet / wardrobe
A walk-in closet may turn out to be the perfect place, if you have one. If not, I have heard stories about people recording while sitting halfway inside a wardrobe. My back hurts just thinking about it.
Blanket fort / recording booth
If a closet is out, you are left with a recording booth or a blanket fort. I considered throwing a heavy blanket over the table in the living room to create a recording booth, but unfortunately the position you have to get into is way too uncomfortable for me. I also considered an alternative built out of couch cushions:
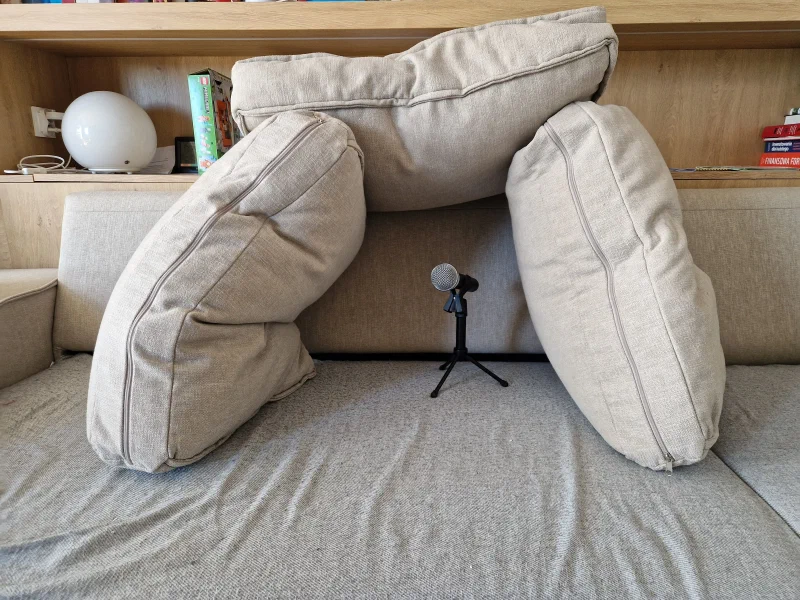
Unfortunately, that would also require sitting on the floor in an uncomfortable position. You can also build a standing or sitting version yourself. There are plenty of tutorials online showing how to build something like this.
Office call booth
During my professional career, I have used conference rooms after work many times. Sometimes we played board games or watched films there. All of it, of course, with the consent and blessing of our managers. We always cleaned up after ourselves, and management treated it as team building. Many offices now have call booths or small conference rooms. If you are on good terms with your managers, and your recordings are not related to your job, this might be an option for you.
Summary
A good recording space does not have to look like a professional studio. Most of all, it should stay out of your way. If the room has little reverb, lets you avoid household noise, and gives you a comfortable place to sit for a while, you are already much further along than it might seem. Acoustic panels, curtains, carpets, and a couch all help, but the most important thing is to test the conditions before recording. Sometimes the best studio is just an ordinary room where nothing booms, nothing hums, and nothing forces you into a position you will regret after twenty minutes.
In the series
Previous part: How to record a solo podcast - gear